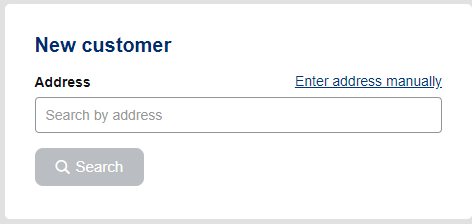
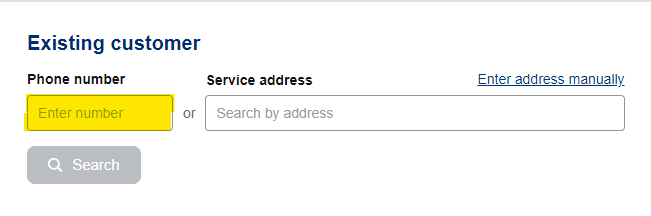
Step 0 - Customer Address
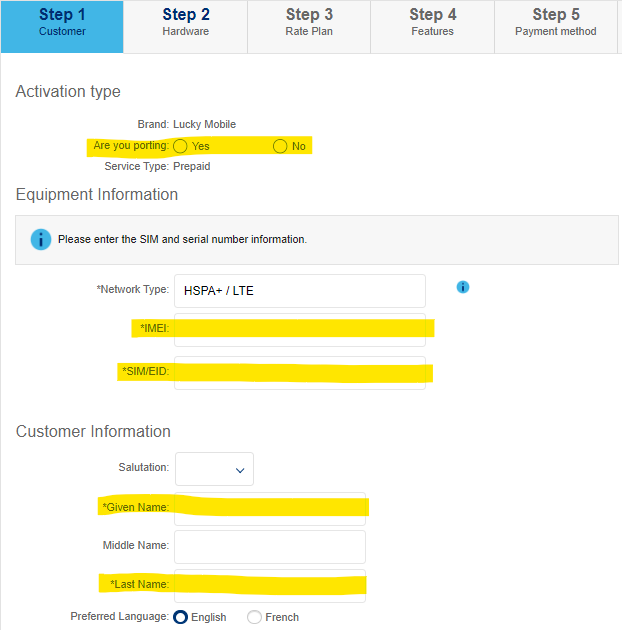
Step 1 - Customer Details

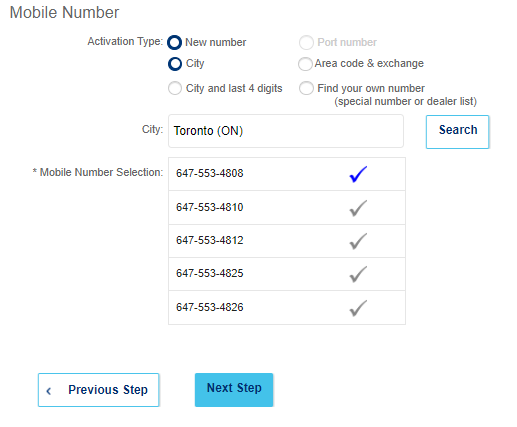
Step 2 - Choose a Number
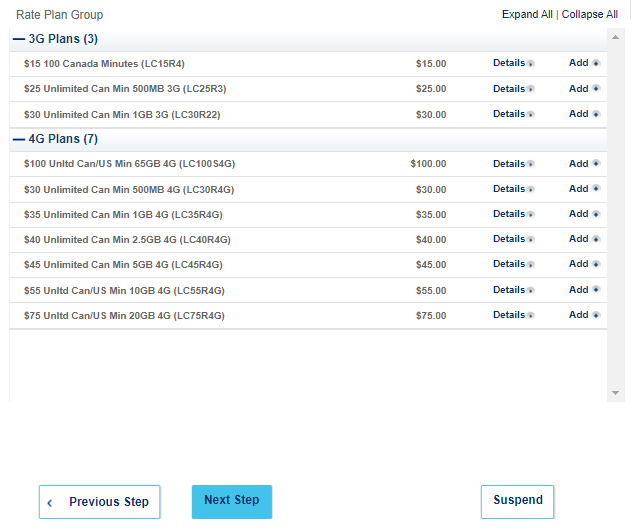
Step 3 - Choose a Plan
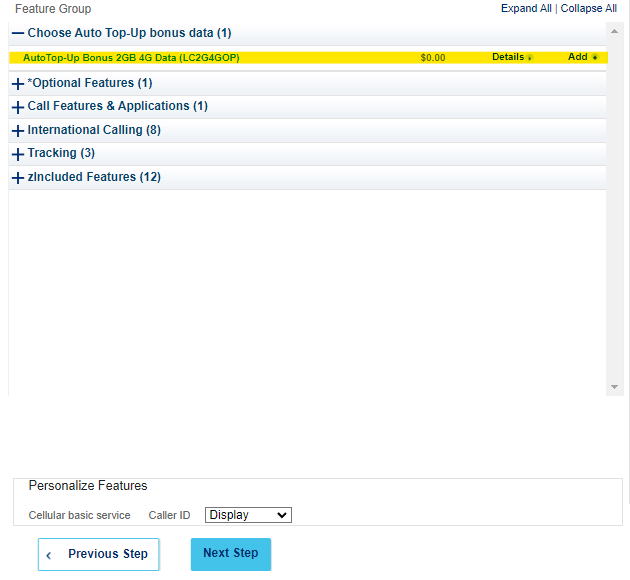
Step 4 - Extra Features
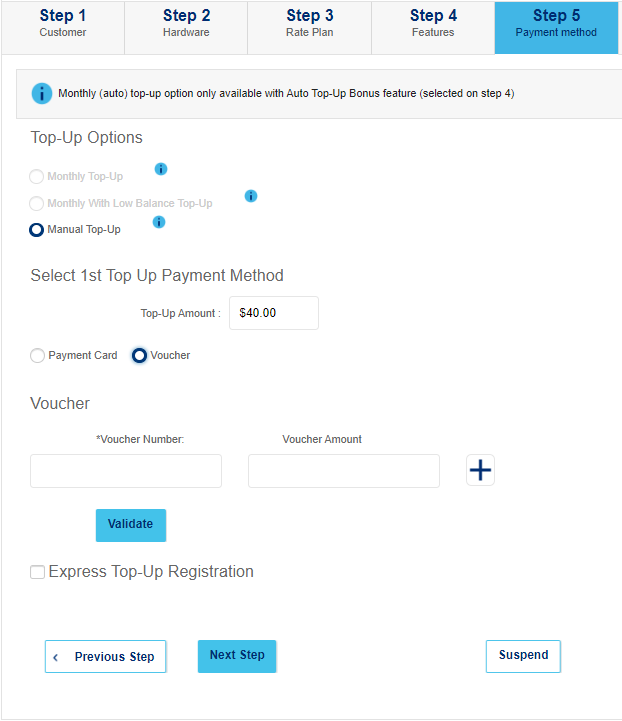
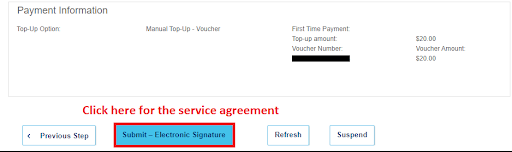
Step 5 - Account Top-Up
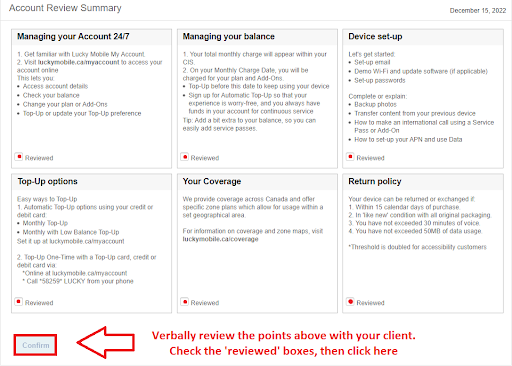
Step 6 - Account Summary
Step 0 - Customer Address
Step 1 - Customer Details
Step 2 - Choose a Number
Step 3 - Choose a Plan
Step 4 - Extra Features
Step 5 - Account Top-Up
Step 6 - Account Summary
Step 7 - Activate the eSIM

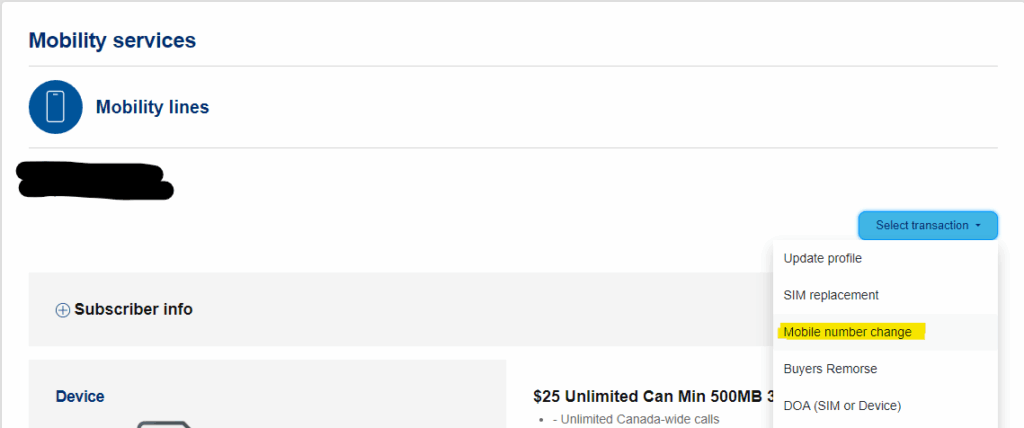
Step 0 - Activate a new SIM/Number
Step 1 - Start a number swap on the new SIM
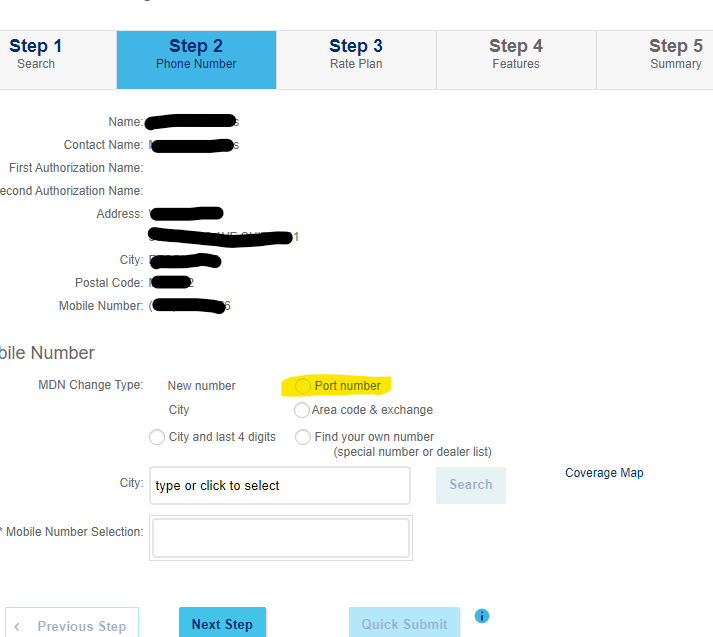
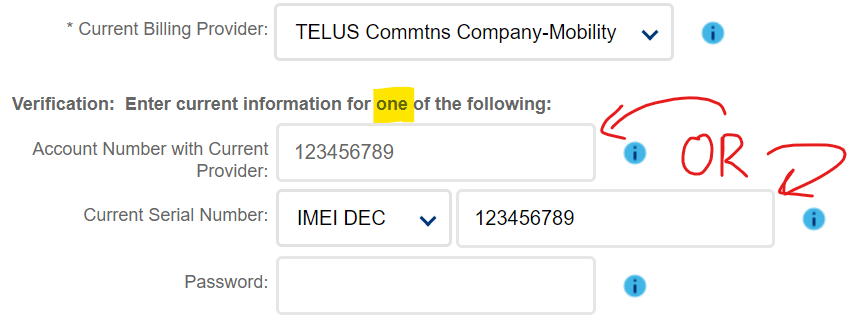
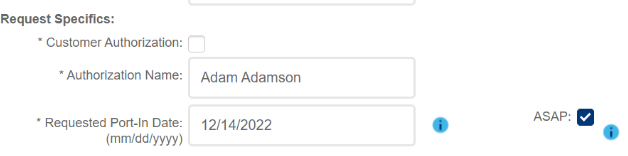
Step 2 - Process the Port Request
Step 3 - Confirm port request
Step One
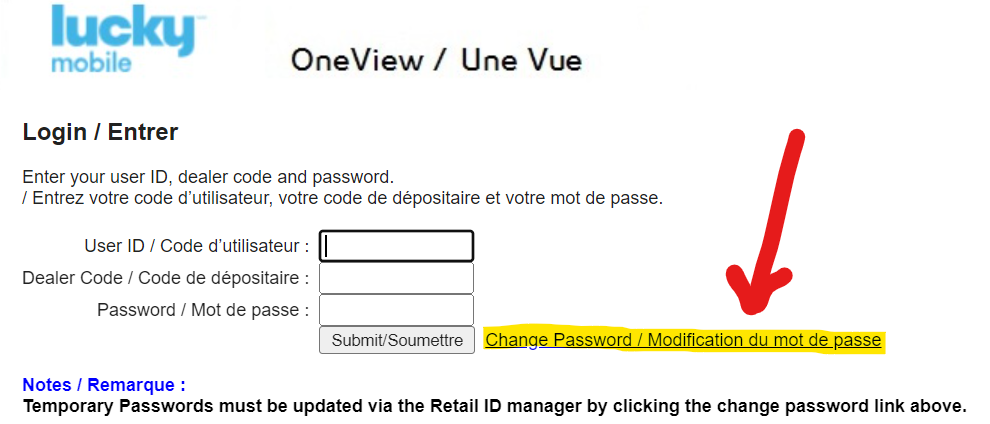
Step Two
Step Three

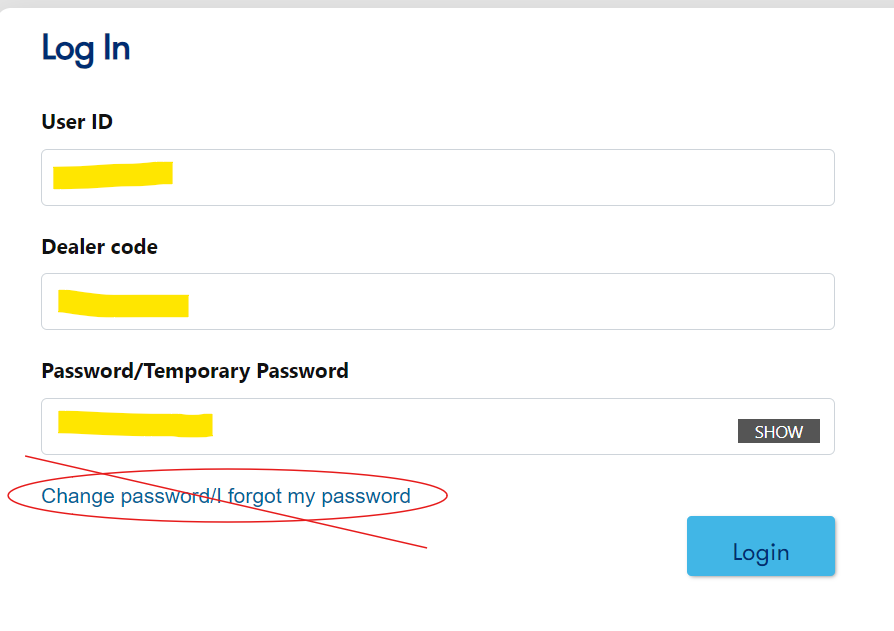
Step One
Step Two